Sunday, March 6, 2016

Tutorial Zipper Pouch Lace


Hello. To celebrate my new book, Scrap Patchwork, I've put together a series of zipper pouches. 

But first, let put my own plug on this wonderful book. It’s a DIY book on making organized scrappy quilts. I talk about color and organizing your stash. You’ve gotta check it out. Most of the quilt patterns comes with alternate layouts and sizes, providing you with more possibilities. You’re going to love it.

https://www.etsy.com/listing/267884263/scrap-patchwork-book?ref=shop_home_active_3

Finished Size 8” x 11”

Materials:
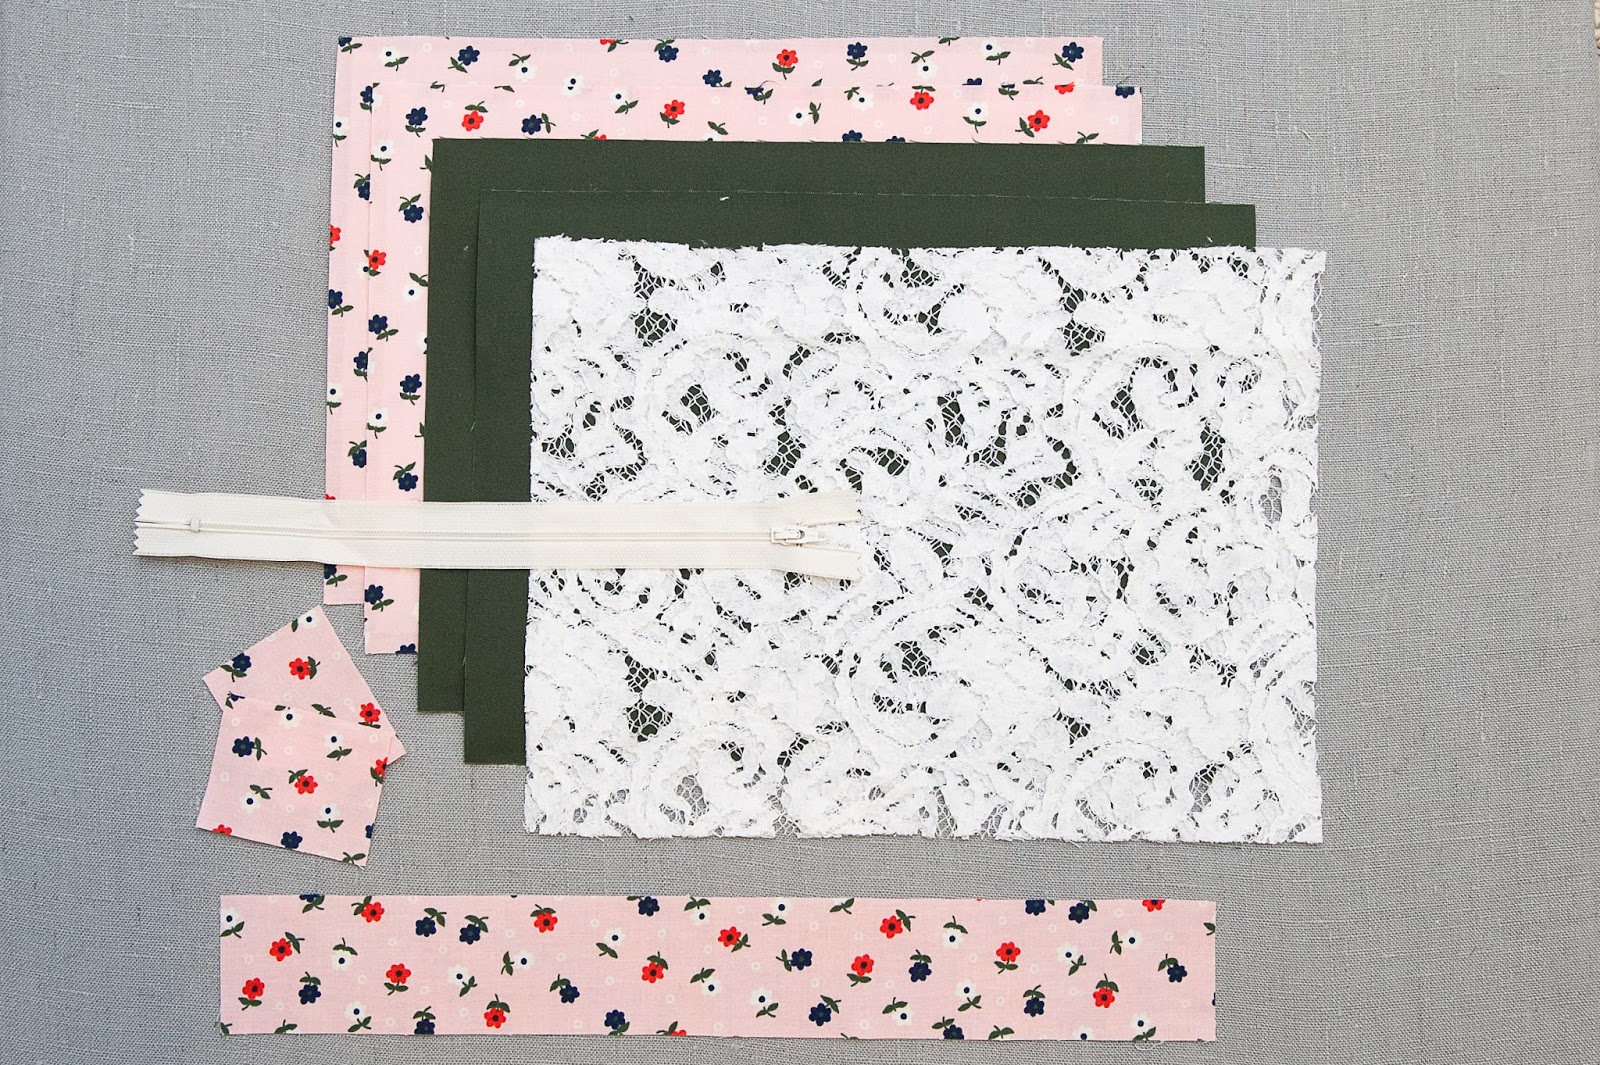
1/2 yard of interfacing
Fat quarter of exterior
Fat quarter of interior, straps, and zipper end covers
Fat quarter of lace
9” zipper
General quilting and sewing supplies


Cutting:
Note: I used a Pellon 809 interfacing for both the interior and exterior. I wanted my pouches stiff. Though, you don’t have to have it as stiff as mine. To soften the bag, only apply interfacing to the exterior fabric. It’s your choice.

Interfacing
     4 – 8” x 11”

Exterior fabric
     2 – 8 1/2” x 11 1/2”

Interior fabric, strap, and zipper end covers
     2 – 8 1/2” x 11 1/2”
     1 – 2” x 14 1/2” (optional strap)
     2 – 1 1/2” x 2 1/2” (zipper end covers)

Lace
     2 – 8 1/2” x 11 1/2”

Sew with 1/4” seam allowance.
Make the Strap:
Choose to iron on fusible interfacing on the wrong side of the handle. I did for my Zipper Pouch Square-in-a-Square. However it was so stiff, I had to place the end next to each other, instead of on top of each other. For this pouch, I left the interfacing off and I like the soften feel of it.  Click here to see how to make a strap.


Prep the Zipper and Make the Bag:
1.   Refer to the Zipper Pouch Square-in-a-Square to prep to the zipper.
2.     Iron on interfacing to front and back exterior, and front and back interior units. Center the interfacing to the wrong side of the fabrics. The interfacing is 1/4” short on all four sides. This is intended to reduce seam bulk.
3.     Place the lace on top of the right side of the exterior fabric. Secure it in place by stitching  it with a 1/8” seam allowance.
4.     Refer to the Zipper Pouch Square-in-a-Square to make the pouch.


Add the Zipper Tassel:
Click here to see how to make a zipper tassel for your pouch.
 
There you have it. There are other version of this bag to check out over on my blog. Now that you have all the ingredients to make your very own pouch, it’s your turn to make it blossom.

Enjoy!
Sandra

Thursday, March 3, 2016

McCall's Quick Quilt - April/May 2016 Quilt Feature


Hello Friends,
 
My very first magazine cover on McCall's Quick Quilt, April/May 2016 issue. I'm so thrilled.
 
 
This quilt is o so easy. It's large half square triangles and bunch of sashing. You could totally make this uber modern by playing with bright colors and play with medium tones by separating them by warm and cool colors.
 
This couldn't have happened without the McCall's and my sponsors:
 
50wt Cotton Thread by Aurifil
Warm & White Batting by the Warm Company
Sashing and Border Fabric by Mochi Linen for Moda
Print Fabrics by Corey Yoder for Moda
White Bella Solid Fabric by Moda


If you're a subscriber, then you should have received your issue. The issue is on newsstands now.
 
While I have your attention, let me tell you about an awesome opportunity to purchase my book, Scrap Patchwork. I have my independent quilt pattern collection. If you love what you see here, you're going to love my book and patterns.
 
https://www.etsy.com/shop/makeitblossom?ref=hdr_shop_menu
 
 
Make it Blossom,
Sandra


Monday, February 29, 2016

Tutorial Easter Fabric Basket


Hello Friends,
I have a free tutorial at We All Sew by BERNINA for an Easter Basket. Isn't it darling.

Check it out.
Sandra

Sunday, February 28, 2016

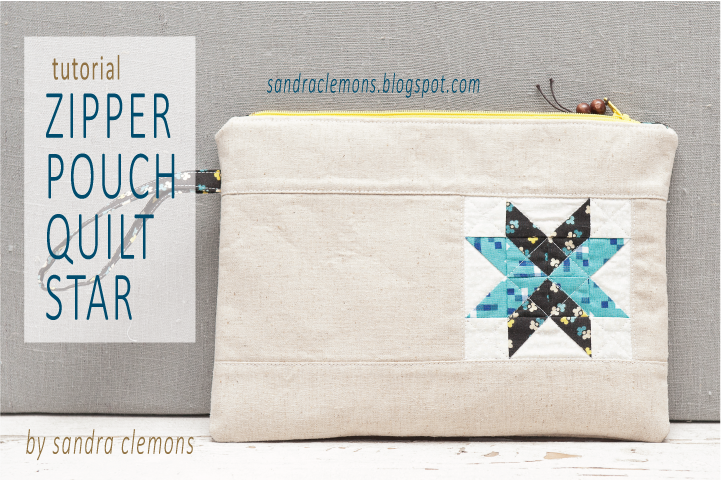
Tutorial Zipper Pouch Quilt Star

 
Hello. To celebrate my new book, Scrap Patchwork, I've put together a series of zipper pouches. 

But first, let put my own plug on this wonderful book. It’s a DIY book on making organized scrappy quilts. I talk about color and organizing your stash. You’ve gotta check it out. Most of the quilt patterns comes with alternate layouts and sizes, providing you with more possibilities. You’re going to love it.
 
https://www.etsy.com/listing/267884263/scrap-patchwork-book?ref=shop_home_active_3
 
Finished Size 8” x 11”

Materials:
1/2 yard interfacing
Fat quarter fabric for exterior (linen)
1/2 yard fabric for interior, block, zipper end covers, and strap (navy)
Fat quarter fabric for white (block)
5” x 5” square fabric for blue (block)
9” zipper
General quilting and sewing supplies
 

Cutting:
Note: I used a Pellon 809 interfacing for both the interior and exterior. I wanted my pouches stiff. Though, you don’t have to have it as stiff as mine. To soften the bag, only apply interfacing to the exterior fabric. It’s your choice.

Interfacing
     4 – 8” x 11”

Exterior fabric (linen)
     1 – 8 1/2” x 11 1/2” (back)
     2 – 2 1/2” x 11 1/2” (front)
     1 – 1 1/2” x 4 1/2” (front)
     1 – 4 1/2” x 6 1/2” (front)

Interior fabric, block, zipper end covers, and strap (navy)
     2 - 8 1/2” x 11 1/2” (interior)
     4 – 1 7/8” x 1 7/8”; cut diagonally once
     2 – 1 1/2” x 2 1/2” (zipper end covers)
     1 – 2” x 14 1/2” (optional strap)

White (block)
     4 – 1 1/2” x 1 1/2”
     1 – 3 1/4” x 3 1/4”; cut diagonally twice

Blue (block)
     4 – 1 7/8” x 1 7/8”; cut diagonally once


(Here are all the pieces for the front exterior of the pouch.)

Sew with 1/4” seam allowance.
 

Make the Block:
Finishes 4” x 4”

1.       Stitch together a blue and navy triangle together to make a half square triangle. Make 4. Press two seams towards the blue and the other two towards the navy.

2.       Take two half square triangles to stitch together. Make 2. Note in the picture the direction of the unit’s diagonal and seam.


3.       Join the two units from above to make a pinwheel unit. Pinwheel the seams.


4.       Make 4 flying geese units by stitching together two navy triangle to the white triangle, and two blue triangles to the white triangle. Make a total of 4; 2 navy and 2 blue. Press seam allowances away from the white. Clip dog ears.
 
 
5.       Join two white squares to each end of the navy flying geese units to make the top and bottom units. Make 2 and press seams towards the white squares.
 

6.       Stitch together two blue flying geese units to each end of the pinwheel to make the center unit. Match the sides to the blue. Press seams towards the pinwheel unit.
 

7.       To complete the star block, stitch together the top and bottom units to the center unit. Press seams towards the top and bottom units.

 
8.       Join the 4 1/2” x 6 1/2” linen to the left and the 1 1/2” x 4 1/2” to the right of the star block. Press seams towards the linen.
 

9.       Stitch the 2 1/2” x 11 1/2” linen to the top and bottom to make the exterior front cover. This measures 8 1/2” x 11 1/2”.


Make the Strap:
Choose to iron on fusible interfacing on the wrong side of the handle. I did for my Zipper Pouch Square-in-a-Square. However it was so stiff, I had to place the end next to each other, instead of on top of each other. For this pouch, I left the interfacing off and I like the soften feel of it.  Click here to see how to make a strap.


Prep the Zipper and Make the Bag:
1.      Refer to the Zipper Pouch Square-in-a-Square to prep to the zipper.

2.       Iron on interfacing to front and back exterior, and front and back interior units. Center the interfacing to the wrong side of the fabrics. The interfacing is 1/4” short on all four sides. This is intended to reduce seam bulk.

3.       Feel free to machine quilt the units as desired.


4.     Refer to the Zipper Pouch Square-in-a-Square to make the pouch.
 

Add the Zipper Tassel:
Click here to see how to make a zipper tassel for your pouch.

There you have it. There are other version of this bag to check out over on my blog. Now that you have all the ingredients to make your very own pouch, it’s your turn to make it blossom.
 
Enjoy!
Sandra

Sunday, February 21, 2016

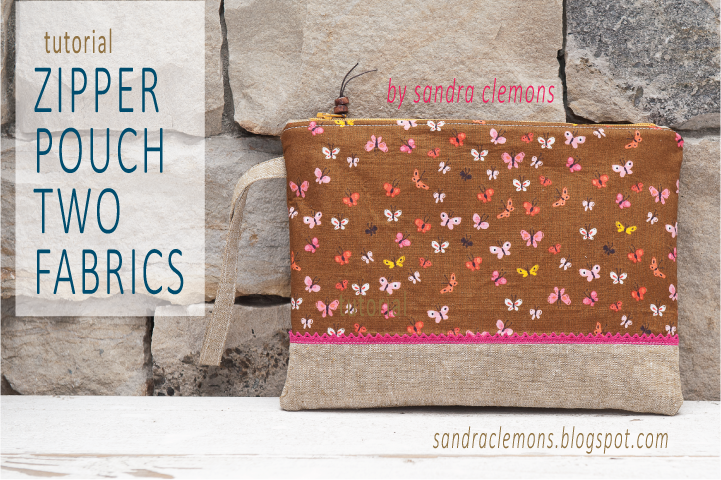
Tutorial Zipper Pouch Two Fabrics

 
Hello. To celebrate my new book, Scrap Patchwork, I've put together a series of zipper pouches. 

But first, let put my own plug on this wonderful book. It’s a DIY book on making organized scrappy quilts. I talk about color and organizing your stash. You’ve gotta check it out. Most of the quilt patterns comes with alternate layouts and sizes, providing you with more possibilities. You’re going to love it.
 
https://www.etsy.com/listing/267884263/scrap-patchwork-book?ref=shop_home_active_3
 
Finished Size 8” x 11”
 
Materials:
1/2 yard of interfacing
Fat quarter of exterior print
Fat quarter of exterior linen
Fat quarter of interior, straps, and zipper end covers
Fat quarter of lace
9” zipper
25” of trim
General quilting and sewing supplies
 
Cutting:
Note: I used a Pellon 809 interfacing for both the interior and exterior. I wanted my pouches stiff. Though, you don’t have to have it as stiff as mine. To soften the bag, only apply interfacing to the exterior fabric. It’s your choice.
 
Interfacing
     4 – 8” x 11”
 
Exterior print
     2 – 6 1/2” x 11 1/2”
 
Exterior linen:
     2 – 2 1/2” x 11 1/2”
 
Interior fabric, strap, and zipper end covers
     2 – 8 1/2” x 11 1/2”
     1 – 2” x 14 1/2” (optional strap)
     2 – 1 1/2” x 2 1/2” (zipper end covers)
 
Sew with 1/4” seam allowance.
 
 
Make the Strap:
Choose to iron on fusible interfacing on the wrong side of the handle. I did for my Zipper Pouch Square-in-a-Square. However it was so stiff, I had to place the end next to each other, instead of on top of each other. For this pouch, I left the interfacing off and I like the soften feel of it.  Click here to see how to make a strap.
 
 
Prep the Zipper and Make the Bag:
1.      Refer to the Zipper Pouch Square-in-a-Square to prep to the zipper.
 
2.      Stitch together the exterior print and linen together along the length 11 1/2”. Press seam allowance towards the linen fabric. Edge stitch along the seams. Make 2.
 
3.      Add trim along the seam line for both exterior units.
 
  
3.     Iron on interfacing to front and back exterior, and front and back interior units. Center the interfacing to the wrong side of the fabrics. The interfacing is 1/4” short on all four sides. This is intended to reduce seam bulk.
4.     Refer to the Zipper Pouch Square-in-a-Square to make the pouch.
 
 
Add the Zipper Tassel:
Click here to see how to make a zipper tassel for your pouch.
 
 
There you have it. There are other version of this bag to check out over on my blog. Now that you have all the ingredients to make your very own pouch, it’s your turn to make it blossom.
 
Enjoy!
Sandra
Related Posts Plugin for WordPress, Blogger...