Hello. To celebrate my new book, Scrap Patchwork, I've put together a series of zipper pouches.
But first, let put my own plug on this wonderful book. It’s a DIY book on making organized scrappy quilts. I talk about color and organizing your stash. You’ve gotta check it out. Most of the quilt patterns comes with alternate layouts and sizes, providing you with more possibilities. You’re going to love it.
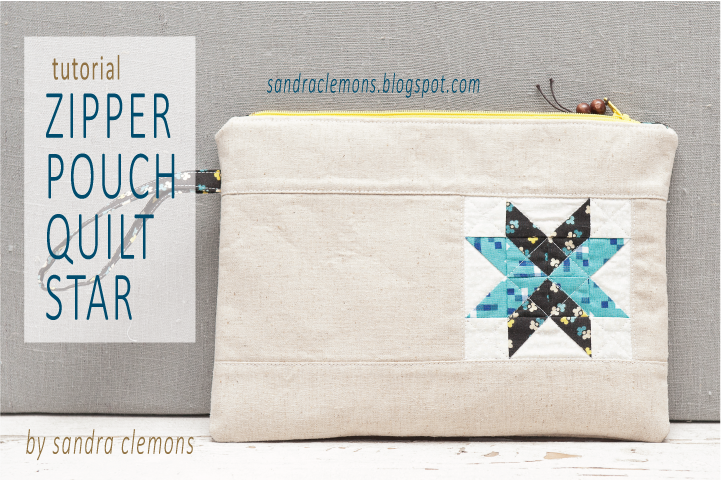
Today's pouch. To jazz up a classic zipper pouch, I've added two 4” square-in-a-square blocks to the front. This bag is so cute and adorable. In fact, my daughter has already taken the pouch and stuffed it with her little toys. For the adults, we have other possibilities to use them. We can use the bags to hold pens & pencils, cards, sewing supplies, make-up, snacks. They are great to organize and tidy your small stuff. I have them everywhere around the house.
Finished Size 8” x 11”
Materials:
1/2 yard interfacing
1/2 yard fabric for purple (exterior, block, and strap)
1/2 yard fabric for white (interior, block, and zipper end covers)
5” x 5” square fabric for lavender (block)
9” zipper
General quilting and sewing supplies
Cutting:
Note: I used a Pellon 809 interfacing for both the interior and exterior. I wanted my pouch stiff. Though, you don’t have to have it as stiff as mine. To soften the bag, only apply interfacing to the exterior fabric. It’s your choice.
Interfacing
4 – 8” x 11”
Exterior fabric, block, and strap (purple)
1 – 8 1/2” x 11 1/2” (back)
2 – 2 1/2” x 11 1/2” (front)
3 – 1 1/2” x 4 1/2” (front)
4 – 2 7/8” x 2 7/8”; cut diagonally once to make 8 triangles (block)
1 – 2” x 14 1/2” (optional strap)
Interior fabric, block, and zipper end covers (white)
2 - 8 1/2” x 11 1/2” (interior)
2 – 3 1/4” x 3 1/4”; cut diagonally once to make 8 triangles (block)
2 – 1 7/8” x 1 7/8” (block)
2 – 1 1/2” x 2 1/2” (zipper end covers)
Lavender (block)
4 – 1 7/8” x 1 7/8”; cut diagonally once to make 8 triangles (block)
(Here are all the pieces for the front exterior of the pouch.)
Sew with 1/4” seam allowance.
Make the Block:
Finishes 4” x 4”
1. Stitch together the lavender triangle to one side of the white square. Make 2.
2. Stitch another lavender triangle directly opposite of the previously sewn triangle. Make 2. Press seam allowances towards the white fabric.
3. Take another lavender triangle and stitch it to third side of the white square. Make 2.
4. Sew in the fourth lavender triangle to the fourth side of the white square. Make 2 and press seams towards the lavender triangle.
5. Pick a side to stitch together a white triangle. Sew another white triangle directly opposite of the white triangle. Make 2. Press seam allowances towards the triangles.
6. Stitch two more white triangles on the remaining sides of the square. Make 2. Press seams towards the white triangle.
7. Sew a purple triangle to one side. Make 2 and press seams towards the purple fabric. Sew another purple triangle directly opposite of the purple triangle. Make 2. Press seam allowances towards the triangles.
8. To complete the block, stitch the two purple triangles to the sides. Make 2 and press seams towards the purple triangles.
9. Join the blocks in between three purple rectangles. Press seams towards the purple rectangles.
10. Finish the front exterior unit by sewing a large purple rectangle to the top and bottom. This measures 8 1/2” x 11 1/2”.
Make the Strap:
Choose to iron on fusible interfacing on the wrong side of the handle. I did for my Zipper Pouch Square-in-a-Square. However it was so stiff, I had to place the end next to each other, instead of on top of each other. For my other pouches, I left the interfacing off and I like the soften feel of it. Click here to see
how to make a strap.
Prep the Zipper:
1. Stitch the zipper end fabric right sides to the zipper. Estimate a 1/4” seam allowance and try to get as close to the zipper stop/end without sewing over it. Finger press the fabric.
2. On the unsewn side of the zipper fabric end, finger press a 1/4” seam allowance with wrong sides together.
3. Fold the fabric in half to cover the zipper tails. Pin and edge stitch to secure it in place. Repeat for the other side of the zipper.
Make the Bag:
1. Iron on interfacing to front and back exterior, and front and back interior units. Center the interfacing to the wrong side of the fabrics. The interfacing is 1/4” short on all four sides. This is intended to reduce seam bulk.
2. Lay exterior front fabric right side up and place the zipper, face down, on top of it, lining up the edges. Keep the zipper open about halfway.
3. Lay one piece of lining fabric on top of the zipper, right side facing down. Pin and stitch the three pieces together along the zipper edge. When you are close to the zipper tab, stop stitching to move the zipper tab towards the stitched area. If you have a zipper foot, then this is the time to use it to get nice and close the zipper teeth. Don’t have one; use your quarter inch foot.
4. Fold the exterior front unit away from the zipper, while keeping the interior fabric under the zipper. Edge stitch the exterior unit, which will stitch over the seam allowance of the exterior unit, zipper, and interior unit.
5. Turn the two units down and away from the zipper. The wrong sides are now together.
6. To sew the opposite side the zipper, lay the exterior back unit wrong side down over the unsewn side of the zipper. Place the interior fabric under the 3 units, wrong side facing down. Pin together only the unstitched exterior back unit, interior unit, and zipper edge.
7. Fold over the exterior back unit away from the three units. Edge stitch the exterior along the zipper.
8. Add your personal label. Place is on the interior fabric where the zipper closes to the left.
9. Although the images doesn’t show it. It’s best practice to trim away the zipper end covers.
10. Open the bag with the zipper in the center; while the two interior units are right sides together on one side, and on the other side, the exterior units are right sides together. The zipper is inside of the fabric pieces.
11. Add the strap by placing it inside the bag, which is inside out. Place and pin the strap to the exterior back side and underneath the pull tab of the zipper when it is closed.
12. Pin and stitch along three sides of the bag, leaving the bottom of the interior unit open about 4”. Make sure the zipper is halfway open.
13. Finish the bag by reaching inside the bag and unzipping the zipper all the way, grab and pull the exterior fabric through the hole. The zipper will be upside down, but you can push the zipper slider all the way open.
14. The interior and exterior units of the bag are right sides out. Work out all the corners of the pouch to make a nice point.
15. Turn under the bottom edge of the lining a 1/4” with the folded edged tucked in towards each other. Pin in place.
16. Stitch along the folded edges to close the bottom, making sure not to stitch the exterior pieces.
17. Tuck the lining back into the bag and you’re done.
Add the Zipper Tassel:
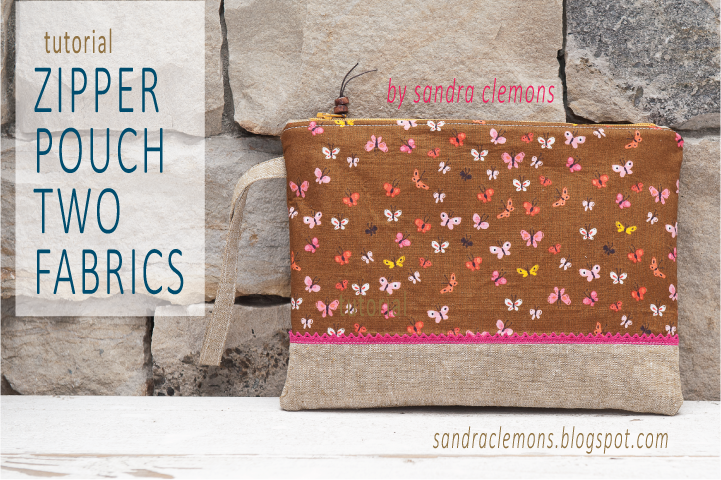
There you have it. There are other version of this bag to check out over on my
blog on the tutorial page. Now that you have all the ingredients to make your very own pouch, it’s your turn to make it blossom.
Enjoy!
Sandra